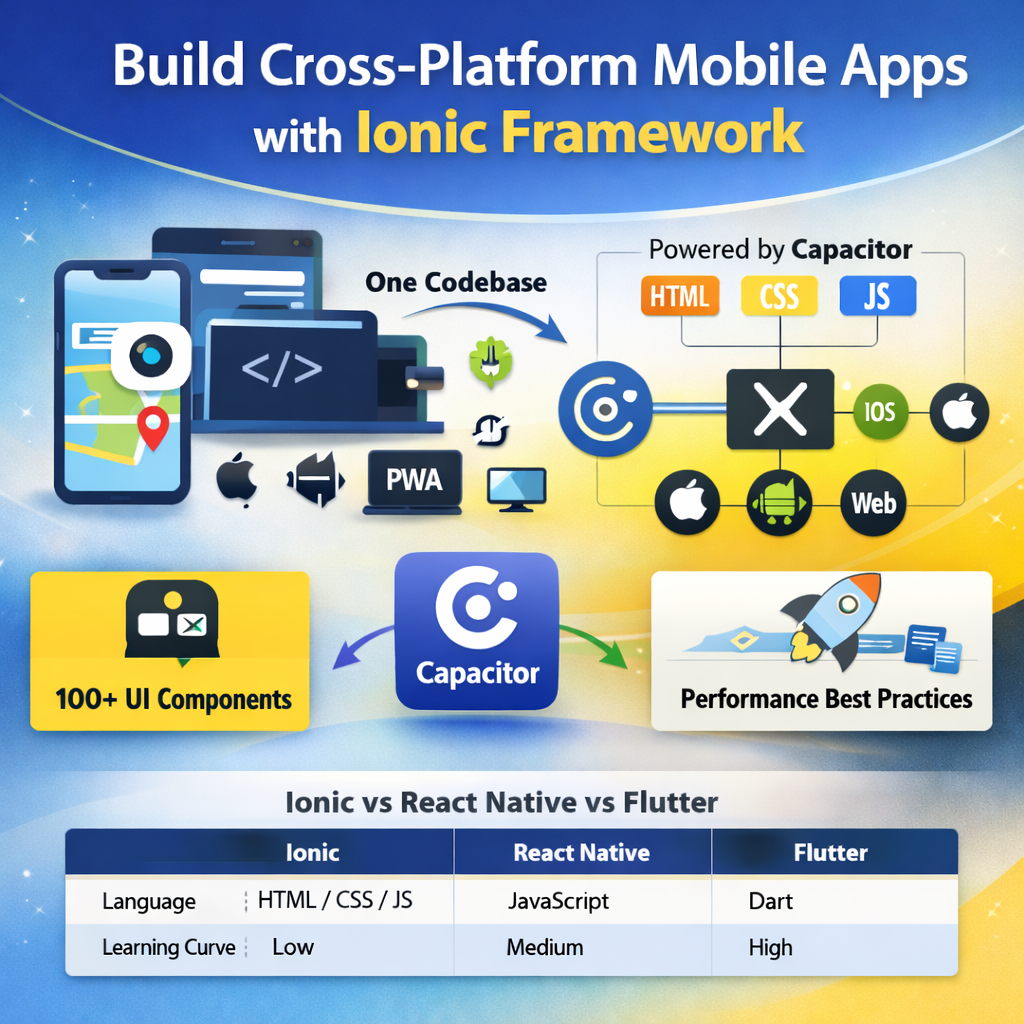
Ionic Framework is an open source UI toolkit for building performant, high-quality mobile, desktop, and Progressive Web Apps using standard web technologies — HTML, CSS, and JavaScript. It lets a single team of web developers build apps that run natively on iOS, Android, and the web.
I've been building Ionic applications for clients since the early days of the framework. From small startups to enterprise-grade apps, here's everything you need to know to build production-ready Ionic apps in 2026.
What is Ionic Framework?
Ionic is not a JavaScript framework itself — it's a UI component library that works with Angular, React, or Vue (and plain JavaScript). The magic comes from Capacitor (Ionic's native runtime layer), which wraps your web app and gives it access to native iOS and Android device APIs.
This means you write one codebase — using your existing web development skills — and compile it to:
- Native iOS app (via Xcode / Apple App Store)
- Native Android app (via Android Studio / Google Play Store)
- Progressive Web App (PWA) — runs in any browser
- Electron desktop app (optional)
Ionic + Capacitor Architecture
Modern Ionic apps (Ionic 7+) use Capacitor as the native runtime, replacing the older Cordova approach. The architecture works like this:
- Your app is built as a standard web app (Angular/React/Vue)
- Capacitor wraps it in a native WebView (WKWebView on iOS, Android WebView on Android)
- Capacitor Plugins bridge your JavaScript code to native device APIs (Camera, GPS, Push Notifications, File System, etc.)
- The result is a native
.ipa(iOS) or.apk/.aab(Android) app that passes App Store review
// Installing Ionic + Capacitor
npm install -g @ionic/cli

# Create new Ionic app with Angular
ionic start myapp tabs --type=angular

# Add native platforms
ionic cap add ios
ionic cap add android

# Build and sync
ionic build
ionic cap sync

# Open in native IDE
ionic cap open ios     # opens Xcode
ionic cap open android # opens Android Studio
Ionic UI Components — What Makes It Powerful
Ionic ships with 100+ pre-built UI components that automatically adapt their styling to match the host platform — iOS or Android. The same <ion-button> looks like an iOS button on iPhone and a Material Design button on Android.
Key UI Components
Navigation: ion-tabs, ion-menu, ion-router-outlet, ion-back-button
Lists: ion-list, ion-item, ion-virtual-scroll (for large datasets)
Forms: ion-input, ion-select, ion-toggle, ion-datetime
Overlays: ion-modal, ion-alert, ion-toast, ion-action-sheet
Media: ion-img, ion-avatar, ion-thumbnail
Accessing Native Device Features with Capacitor
One of the most common questions is: "Can I access the phone's camera, GPS, notifications?" Yes — through official Capacitor plugins:
// Camera Plugin
import { Camera, CameraResultType } from '@capacitor/camera';

async function takePicture() {
  const image = await Camera.getPhoto({
    quality: 90,
    allowEditing: true,
    resultType: CameraResultType.Uri
  });
  const imageUrl = image.webPath;
  // Display the image in your template
}

// Geolocation Plugin
import { Geolocation } from '@capacitor/geolocation';

async function getCurrentPosition() {
  const coordinates = await Geolocation.getCurrentPosition();
  console.log('Current position:', coordinates);
  // { coords: { latitude: 30.73, longitude: 76.77 } }
}

// Push Notifications Plugin
import { PushNotifications } from '@capacitor/push-notifications';

async function registerPushNotifications() {
  const result = await PushNotifications.requestPermissions();
  if (result.receive === 'granted') {
    await PushNotifications.register();
  }
}
Performance Best Practices for Ionic Apps
Ionic apps can feel sluggish if not optimized. After building 50+ Ionic apps, here are the patterns that matter most:
1. Use Virtual Scroll for Long Lists
Rendering 500 list items at once kills performance. Use ion-virtual-scroll or the CDK virtual scroll to only render visible items:
<!-- Renders only visible items, not all 10,000 -->
<ion-virtual-scroll [items]="largeDataset" approxItemHeight="73px">
  <ion-item *virtualItem="let item">
    {{ item.name }}
  </ion-item>
</ion-virtual-scroll>
2. Lazy Load Pages
Split your app into lazy-loaded modules so the initial bundle stays small:
// app-routing.module.ts
const routes: Routes = [
  {
    path: 'home',
    loadChildren: () => import('./home/home.module')
      .then(m => m.HomePageModule)
  },
  {
    path: 'profile',
    loadChildren: () => import('./profile/profile.module')
      .then(m => m.ProfilePageModule)
  }
];
3. Optimize Images
Use ion-img which lazy-loads images as they scroll into view. Serve WebP format images. Use Capacitor's image compression when uploading user photos.
4. Use OnPush Change Detection (Angular)
Set changeDetection: ChangeDetectionStrategy.OnPush on all components that receive data as inputs. Reduces unnecessary re-renders by 60–80% in data-heavy screens.
Ionic vs React Native vs Flutter — Which to Choose?
Real-World Ionic App Architecture
For production Ionic apps, I recommend this folder structure:
src/
├── app/
│   ├── core/           # Singletons: AuthService, ApiService, StorageService
│   ├── shared/         # Shared components, pipes, directives
│   ├── features/       # Feature modules (lazy-loaded)
│   │   ├── home/
│   │   ├── profile/
│   │   └── dashboard/
│   └── app-routing.module.ts
├── environments/       # environment.ts, environment.prod.ts
└── theme/
└── variables.scss # Ionic CSS variables (brand colours, fonts)localStorage or sessionStorage. These are accessible from JavaScript and extractable on rooted devices. Always use @capacitor/preferences (secure native storage) for sensitive data in production apps.
Deploying Ionic Apps
- iOS: Build with Xcode, submit to App Store Connect, await Apple review (1–3 days)
- Android: Build signed APK/AAB in Android Studio, upload to Google Play Console (review ~1–3 hours for updates)
- PWA: Deploy the web build to Netlify, Vercel, or any CDN — no App Store needed
- Live Updates: Use Appflow (Ionic's CI/CD) or Capawesome Live Updates to push JS/HTML/CSS changes without App Store review

Anju Batta
Senior Full Stack Developer, Technical SEO Engineer & AI Automation Architect with 15+ years of experience. I build Ionic mobile apps for iOS and Android alongside web platforms using Laravel, Next.js, and Shopify. Available for new projects from Chandigarh, India.
Hire Me for Your Mobile App Project →